Before you begin any faucet repair, turn off the water supply valves under the sink. Place a rag or stopper in the drain to catch any small parts that may fall down the pipe, and make sure the sink is empty.
Pop off the decorative caps on the faucet handles with a screwdriver (or use pliers for two-handle faucets with set screws). This will expose any existing screws that need to be removed. However, if you need some help from experts, you can contact Plumbers Aurora CO.
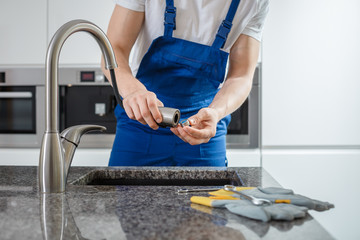
Leaks are one of the most common problems that faucets experience. This is because they often happen as a result of mineral deposits, water sediments, or faulty parts. If you have a leaky faucet, it can be very frustrating and expensive. Fortunately, there are several steps you can take to repair your sink. First, make sure you have dried the faucet and turned off the water supply. Once you have done this, you can remove the handle and access the inner parts of the faucet to see what the problem is.
If your leak is near the spout, it may be caused by a valve seat that has corroded due to sediment buildup. This is a common problem that plumbers encounter, and it’s easily fixed by a professional. However, you can prevent this from happening by regularly cleaning your valve seat.
Another reason for a leaking faucet is a damaged seal. This can be caused by a number of things, such as age or wear and tear, or by the type of water that is used in your home (hard or soft). To fix this, you will need to replace the seal. This can be done by following the instructions that came with your faucet. If you cannot find these, there are many step-by-step videos on the internet that can show you how to replace a seal.
Once the old seal is replaced, it’s important to ensure that there is no water in the drain before you reassemble the faucet. You can do this by placing a drain cover over the drain or by covering the drain with a towel. This will prevent any new or old parts from falling down the drain and getting lost in your pipes.
When you have removed the faucet handles and inner parts, clean them thoroughly with white vinegar. This will help to remove any water sediments that may have built up on the pieces. If you’ve replaced the O-ring, washers, and valve seat and are still experiencing a leaking faucet, it may be time to call a plumber. Water leaks left unattended can lead to serious damage in your home, so it’s best to have a professional come out to diagnose and repair the problem.
Cartridges
The cartridge is the component within a faucet that controls the flow of water. It moves as you operate the handle attached to it, opening and closing the valves that start and stop the flow of water. Cartridges are most often replaced because of wear and tear, but they can also leak from the spout or handles as a result of other problems, like a broken washer or gasket. If your cartridge is wearing out, the first sign will likely be that it’s more difficult to turn the hot or cold handle toward the position you want it in. This problem can be caused by the cartridge itself or the stem it’s attached to, and in most cases, a simple replacement will fix it.
The first step in replacing a faucet cartridge is to shut off the water at the main water line. Once the water is off, you can remove the handle by loosening a decorative cap or screw on the top of the faucet. This will expose the retaining nut on the cartridge, which you can remove with a wrench or pliers.
A new cartridge can be inserted by simply pulling straight up on it, but it’s sometimes necessary to use pliers for leverage. It’s important to note the orientation of the cartridge and any notches it has, so you can reinstall it the same way. Most cartridges have notches for the spring and seat, and you should insert the new one with the notch facing the spout or the valve. You can also spread a little plumber’s grease on the part of the cartridge you’re inserting to make it easier to slip into place.
Many cartridge faucets have a “hot side” and a “cold side.” A new cartridge kit will usually include two matching cartridges, so you can replace both sides of the faucet at the same time. This will save you money, labor costs, frustration, and the potential for more costly repairs in the future when one or both of the cartridges will need to be replaced again due to normal wear and corrosion or hard water mineral deposits.
Seals
If you’ve discovered the source of your faucet leak, then repairing it should be fairly simple. However, some faucets require the removal of decorative parts in order to gain access to the internal components. Depending on the faucet type, the steps required to remove each part may vary. Regardless of the faucet type, it is always wise to drain the water from the faucet and plug the drain with a stopper or rag before you begin. This will prevent water from flowing out during the repair process, potentially damaging your work or causing a mess.
Before you can begin the faucet repair, it is best to locate and purchase any parts that are needed. Most hardware and plumbing supply stores carry a wide range of faucet repair parts, including gaskets, o-rings, valve cartridges, handles, and other accessories. If you’re unsure which parts are needed for your faucet, then it is a good idea to consult the user manual that came with your home or visit a local plumber for assistance.
The first step in repairing most faucets is to remove the handle. Start by gently prying each handle knob off with a flat-head screwdriver. Then, unscrew the screw that mounts the handle to the stem. If the screw is seized, you can use penetrating oil to help loosen it. Once the screw is removed, the handle should pull off easily.
If your leak is coming from the bottom of the faucet spout, then you’ll need to replace the seat washer and possibly the O-ring. The seals in these areas wear out over time due to continual exposure to water and other elements. This is a common problem in many homes, especially if you have hard water.
A disc faucet’s inlet and outlet seals can wear out as well. These seals can be worn out due to sediment buildup or just normal wear and tear. A good way to clean these is to use distilled vinegar and a scouring pad to clean the inside of the cylinder. You can also sand the top of the seat to smooth it if it is pitted or damaged. Once the seat is resealed, you can reassemble the faucet.
Handles
Faucet handles are one of the most important components of your faucet. Not only do they add to the aesthetic of your sink, but they also control the flow and pressure of water through your plumbing system. If your handle starts to become stiff or hard to turn, it may be time to repair or replace it. Fortunately, this is not an extensive job and can be done by almost anyone with some basic tools.
Before beginning any work on a faucet, it is important to make sure that the water supply has been turned off. The shutoff valve for the faucet should be located under the sink and is usually either a small ball or lever that can be rotated to shut off the water. Once this has been done, the faucet handle can be removed and the problem addressed.
A stiff or hard-to-turn faucet handle can be caused by a variety of issues. In many cases, this is simply the result of mineral deposits and corrosion building up in the handle. However, it is possible that the cause of the problem is a damaged seal or gasket. This can be caused by excess water pressure, but it is most often the result of general wear and tear.
The first step in repairing a stiff faucet is to turn off the water supply. This can be done by turning off the shutoff valves for the faucet, which are typically located under the sink. Once the water has been turned off, the handle can be removed by unscrewing the set screw that holds it in place. This screw will vary in size, so it is important to use a spanner that matches the size of your faucet’s screw. Once the screw is loose, the handle can be removed and a new one installed.
The most common type of faucet handle is a lever. These are available in both single- and double-handle varieties and can be used with nearly any faucet configuration. Lever handles are also available in a wide variety of finishes and materials, and they are easy to maintain. Cross-shaped handles are another popular option for homeowners. These can be used with both single- and double-handle compression or cartridge faucets and are typically crafted from porcelain or metal. They are popular in homes with a contemporary Barnhouse aesthetic, and they offer the added benefit of twist operation rather than the push-and-pull movement of lever handles.